Troubleshooting
This guide covers common Windows networking issues and their solutions.
How to Set a Static IP on Windows
A static IP address ensures your computer always uses the same local IP, which is essential for hosting servers, port forwarding, or reliable network access.
This guide applies to Windows 10 and Windows 11.
Steps
-
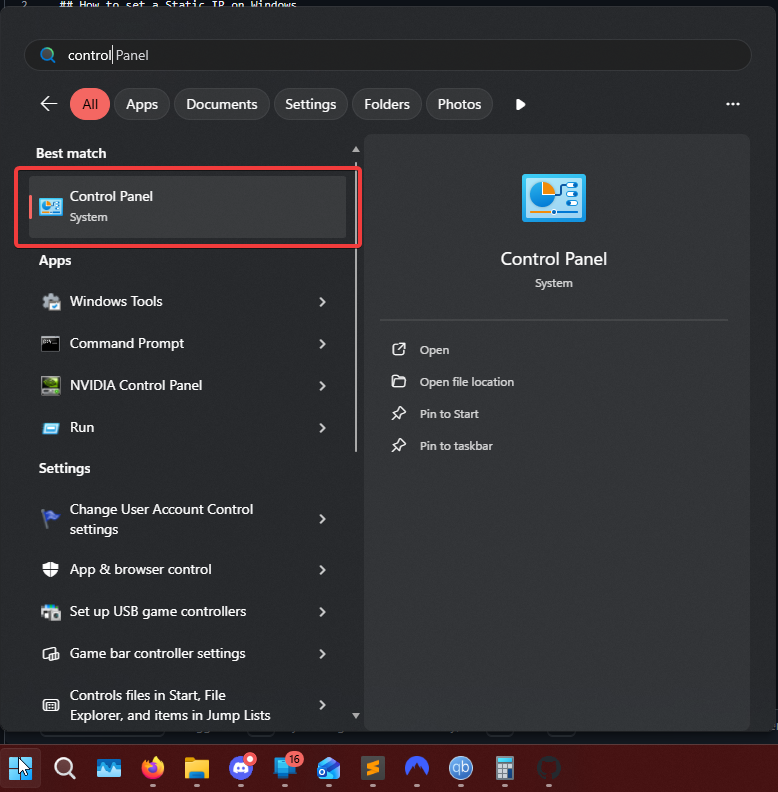
Press the Windows key or click the Windows icon on your taskbar, then search for Control Panel.
-
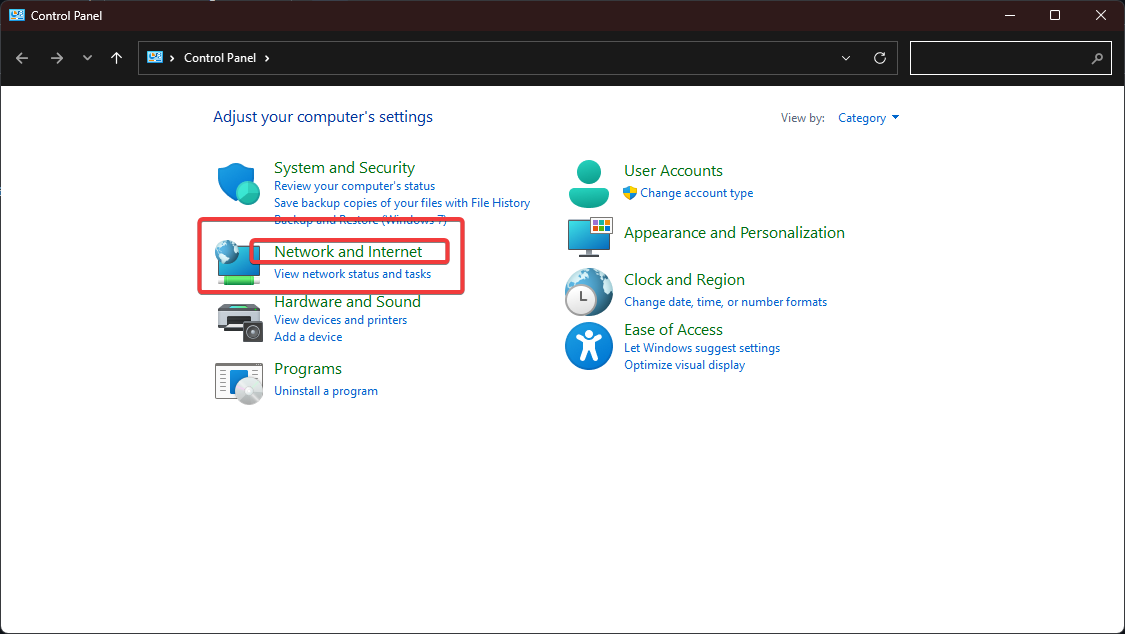
Click on Network and Internet.
-
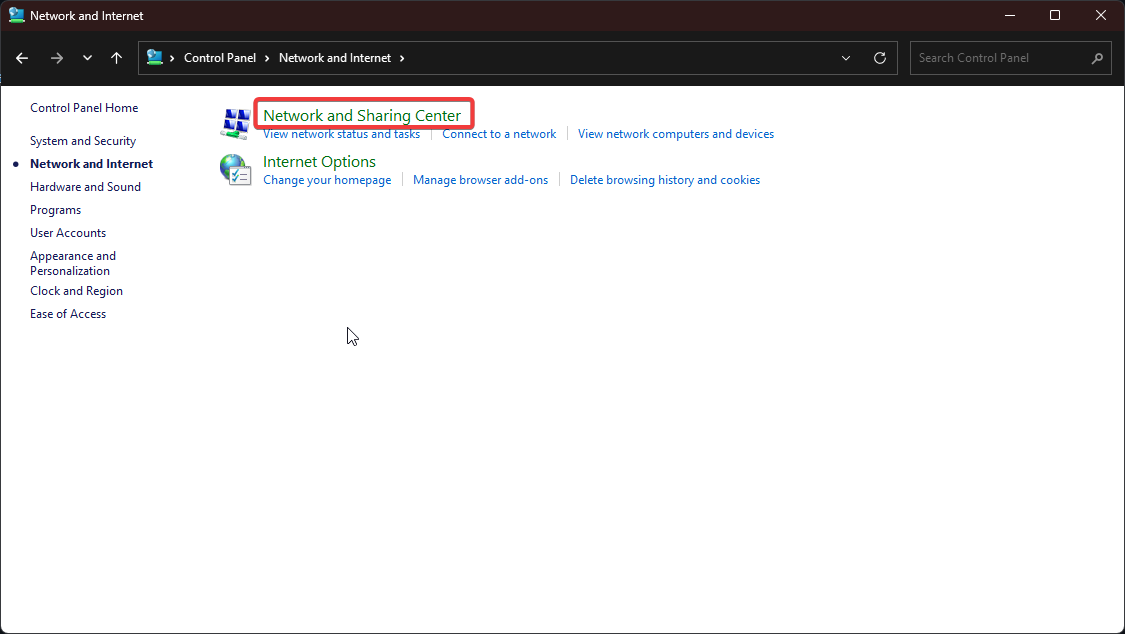
Click on Network and Sharing Center.
-
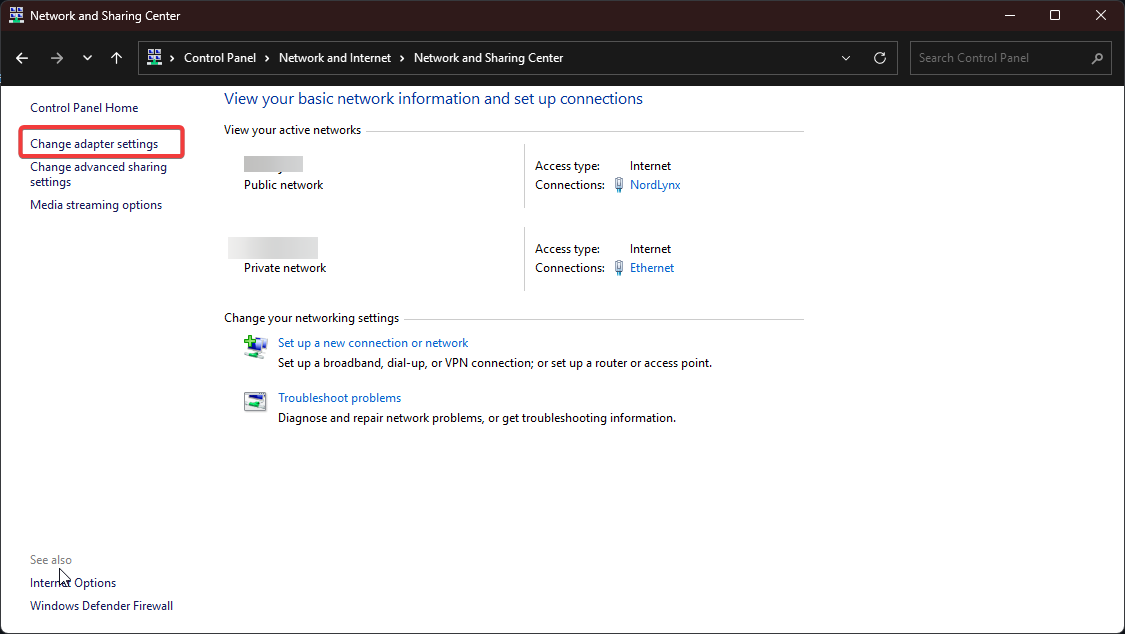
Click Change adapter settings on the left-hand side.
-
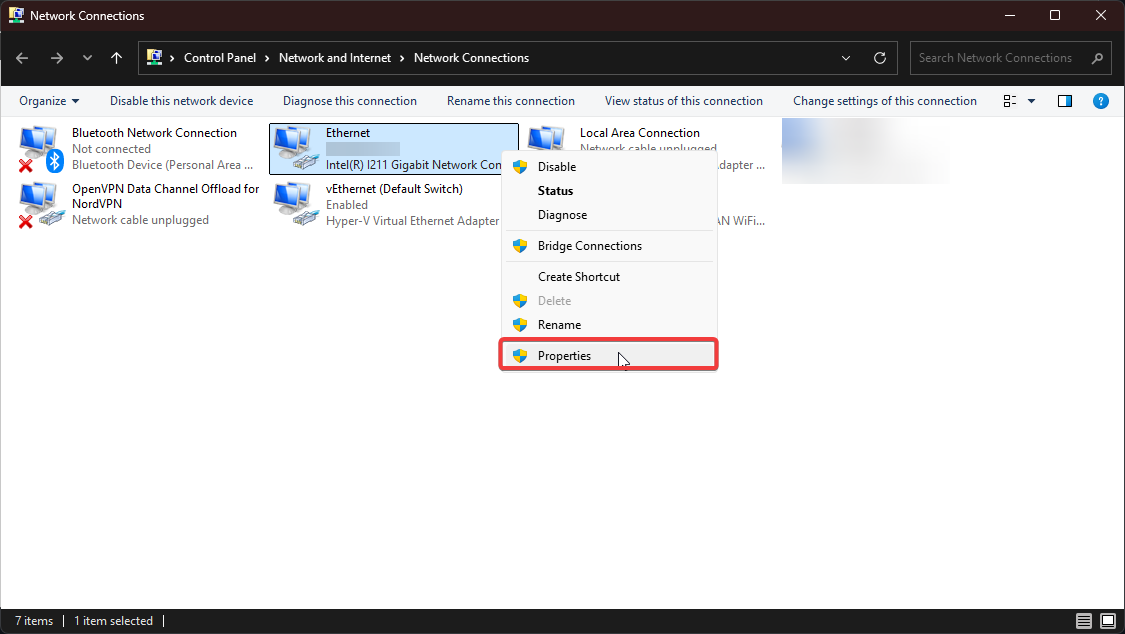
Right-click on your network adapter (Wi-Fi or Ethernet) and select Properties.
-
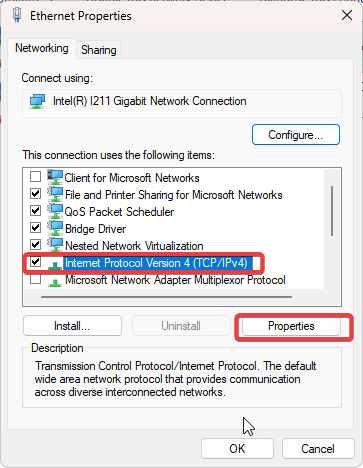
Select Internet Protocol Version 4 (TCP/IPv4), then click Properties.
-
Open PowerShell and type
ipconfigto find your current IPv4 settings. Look for the adapter you selected in step 5.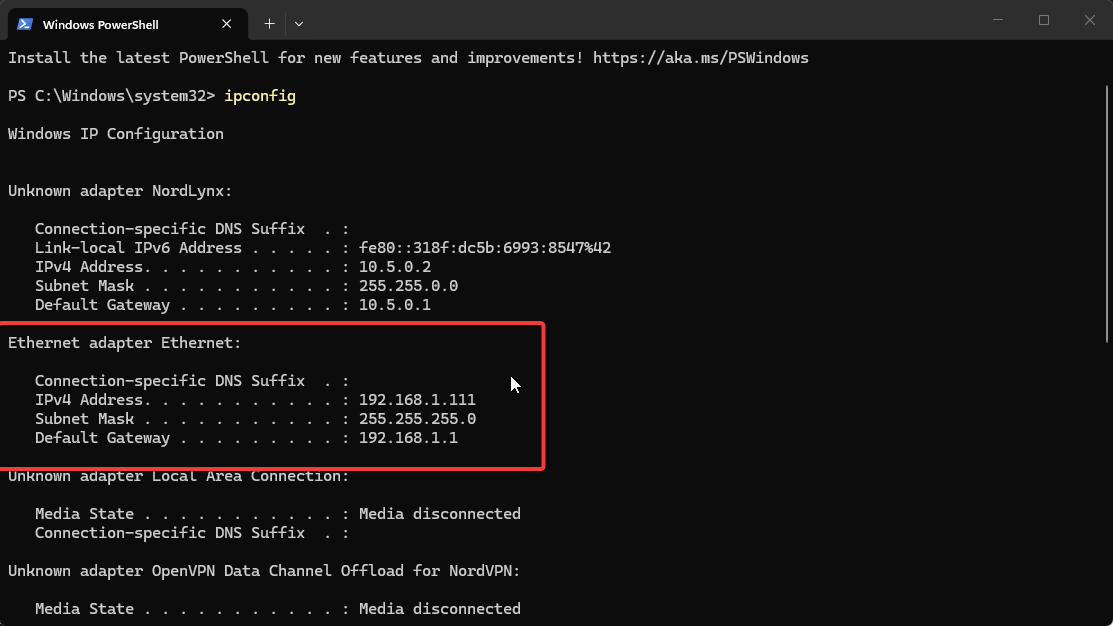 Common Default Gateways
Most residential ISPs use one of these addresses for the router/default gateway:
192.168.0.1192.168.1.110.0.0.1
-
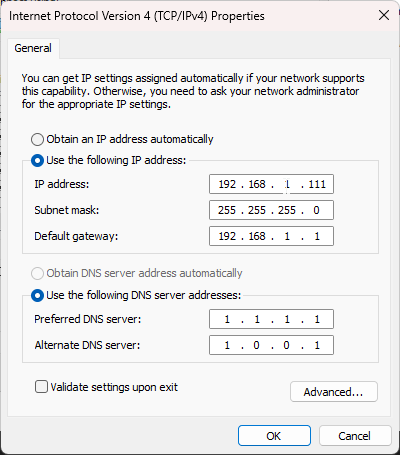
Return to the IPv4 Properties window from step 6. Select Use the following IP address and enter the information from PowerShell:
- IP address: Your desired static IP (e.g.,
192.168.1.111) - Subnet mask: Usually
255.255.255.0 - Default gateway: Your router's IP address
- IP address: Your desired static IP (e.g.,
-
Click OK to save your settings, then close all Control Panel windows.
Fixing Windows Server/SMB Network Discovery Issues
If other PCs on your network cannot see your Windows server or shared folders, the network profile or sharing settings may need adjustment.
Steps
-
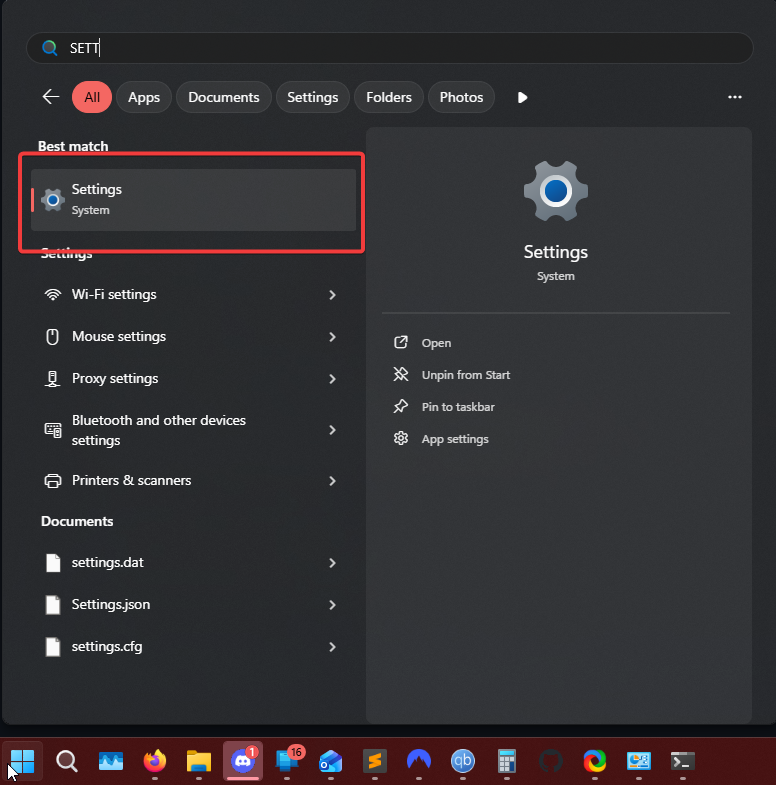
Press the Windows key or click the Windows icon on your taskbar, then search for Settings.
-
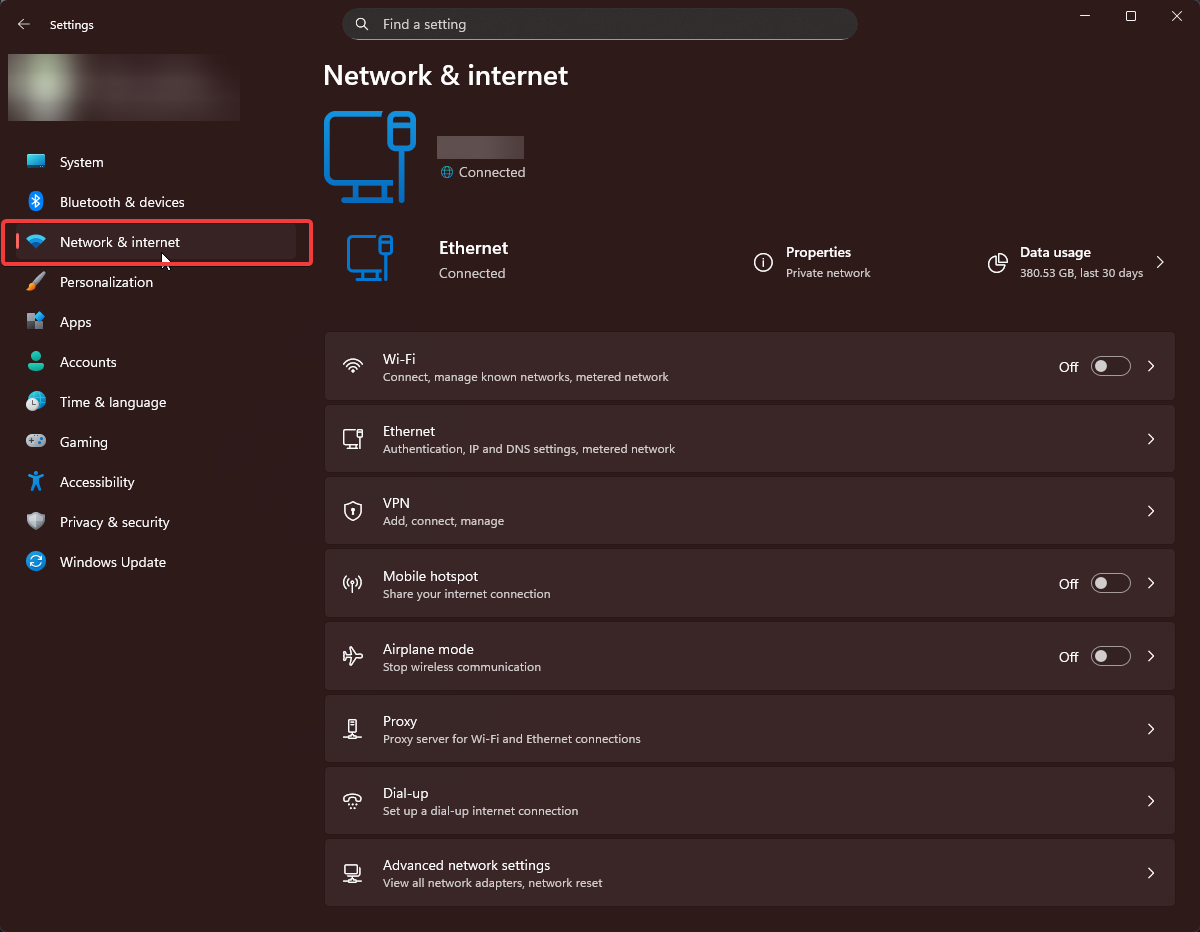
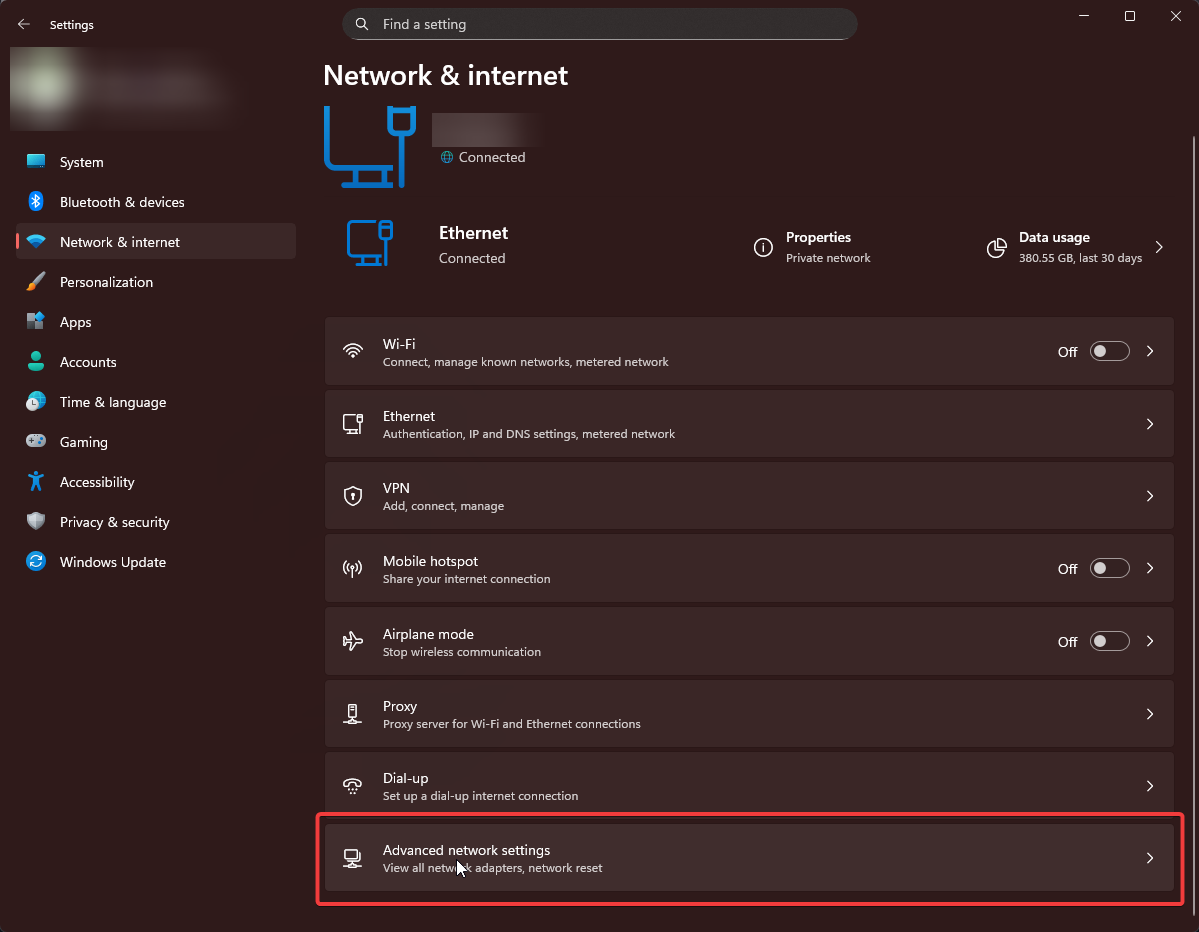
Click on Network & Internet.
-
Check your network profile type. It should say Private. If it shows Public, you need to change it.
-
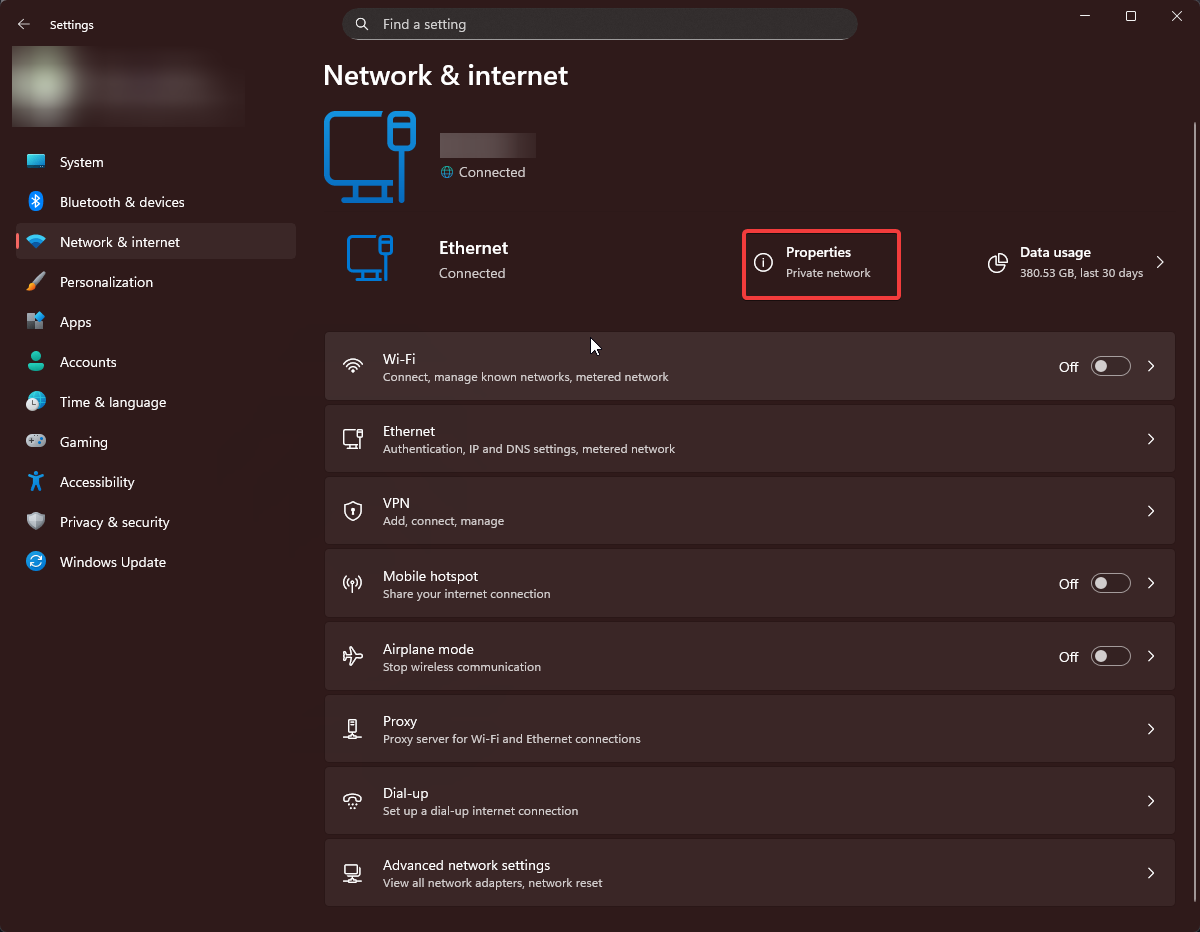
Click on the network connection (highlighted in red in the screenshot above) and select Private.
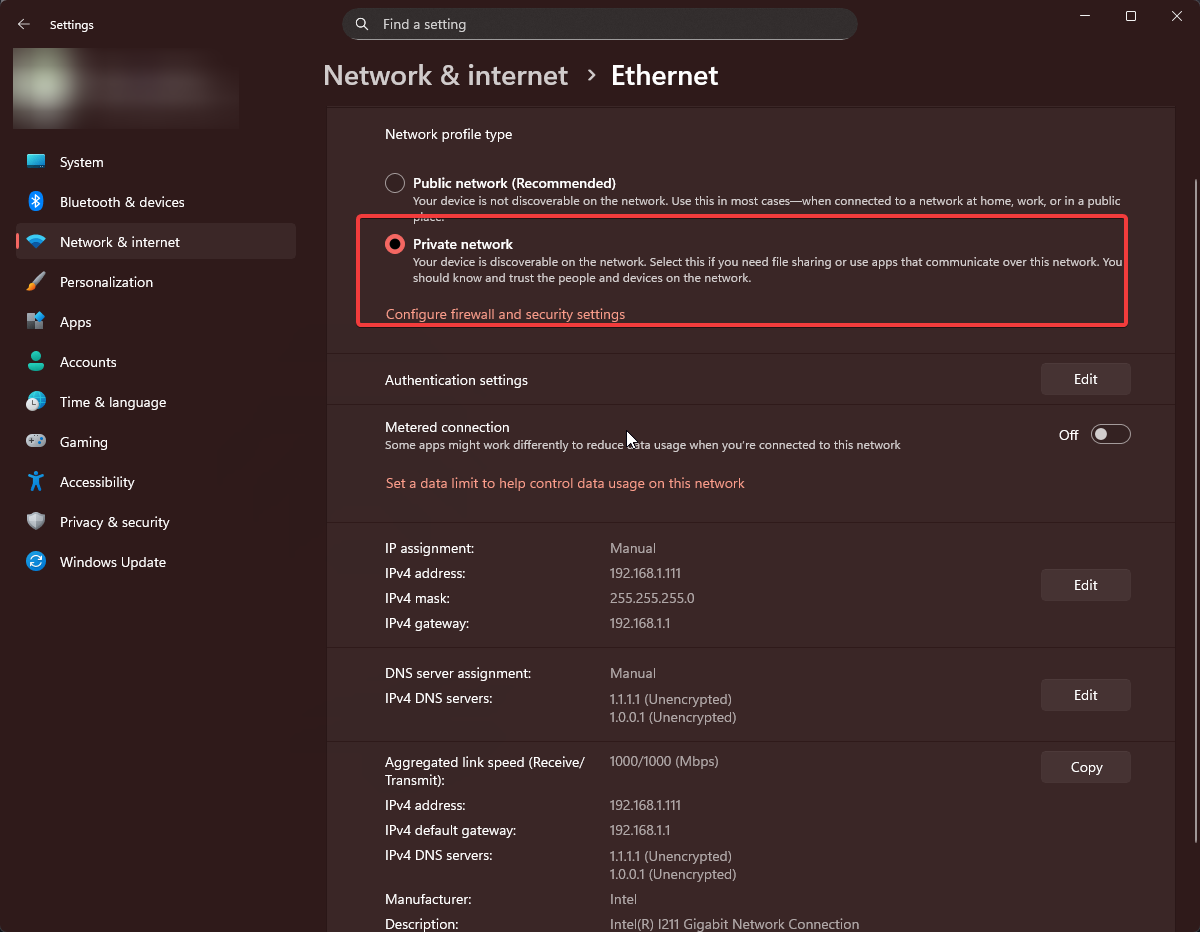
Click Save to apply the change.
-
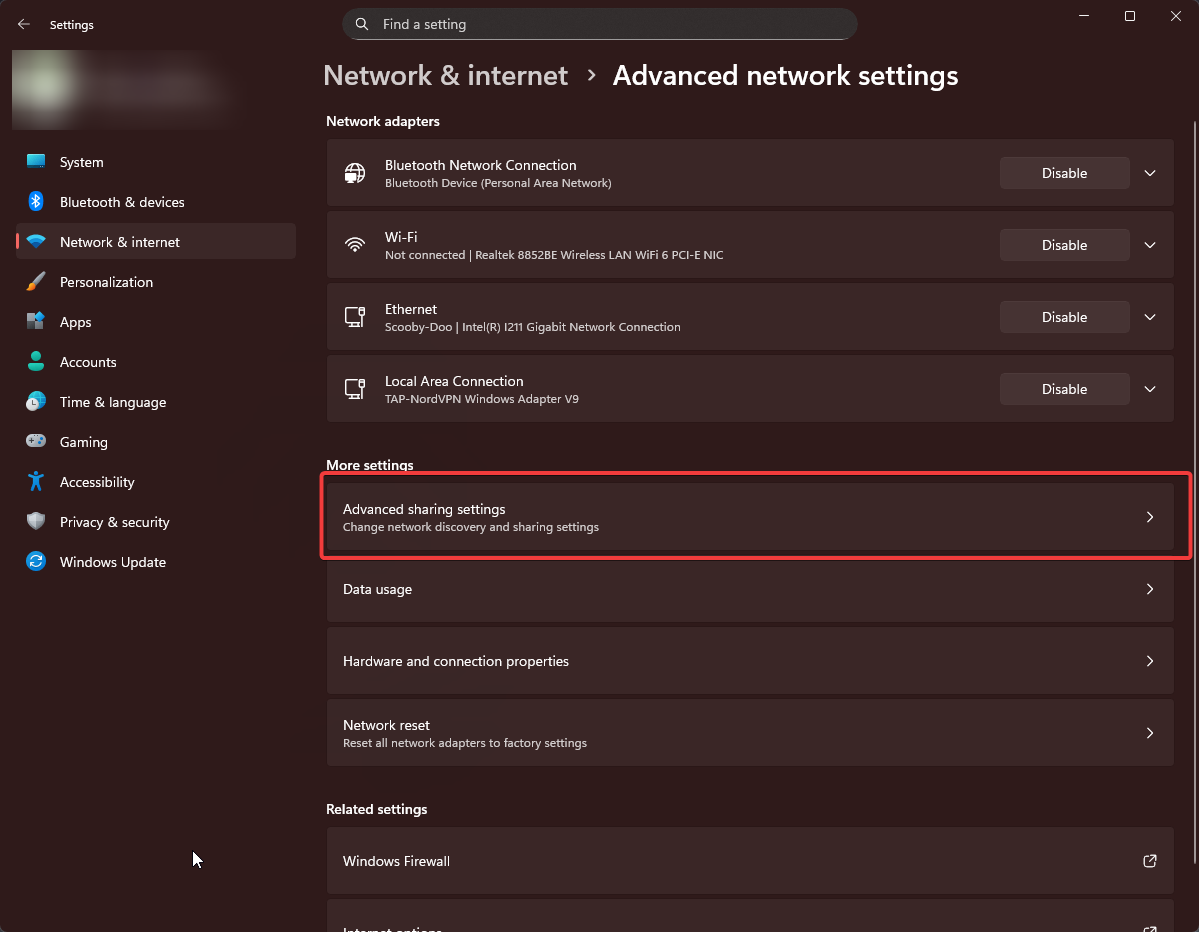
Return to the Network & Internet settings and locate Advanced sharing settings.
-
Click on Advanced sharing settings.
-
Enable the following settings for your Private network profile:
- Network discovery: Turn on
- File and printer sharing: Turn on
 note
noteAfter enabling these settings, other devices on your network should be able to discover and access your shared folders.